

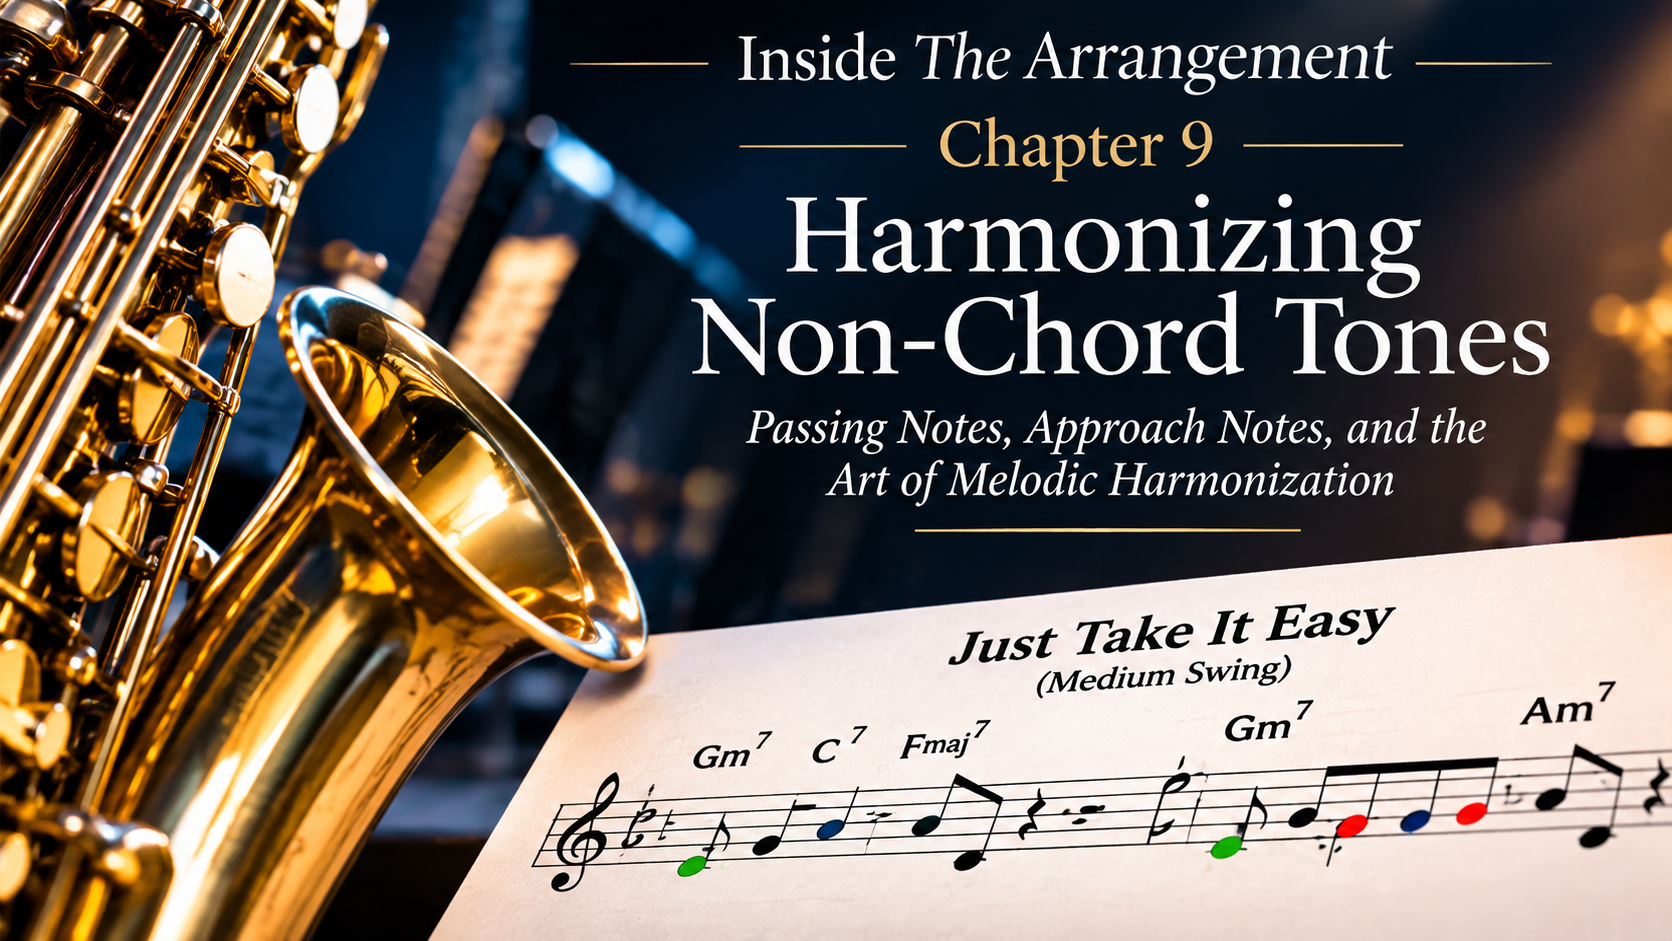
INSIDE THE ARRANGEMENT — Chapter 9
How should Big Band arrangers harmonize passing notes, chromatic approaches, and other non-chord tones? In Chapter 9 of Inside The Arrangement, Rolf Becker demonstrates practical saxophone voicing techniques using annotated scores and audio examples from his original composition, Just Take It Easy.
Harmonizing Non-Chord Tones
Passing Notes, Approach Notes, and the Art of Melodic Harmonization
Not Every Melody Note Belongs to the Chord
In the previous chapter, we explored how to harmonize a melody for a Big Band section using different voicing techniques.
But what happens when the melody contains notes that do not belong to the underlying chord?
This is a situation every arranger encounters.
A melody rarely consists entirely of chord tones. Passing notes, neighboring tones, and chromatic approach notes help create movement, expression, and musical direction.
The question is not whether these notes are allowed. They are an essential part of melodic writing.
The real question is: How should we harmonize them?
Do we keep the accompanying voices within the original chord, or should those voices move with the melody?
To explore this, we will return to our familiar composition, Just Take It Easy.
Rather than introducing a complicated collection of harmonic rules, I want to demonstrate how I approach these decisions in practice.
1. Identifying the Notes That Need Attention
Example 1 — Just Take It Easy: Melody and chord symbols, with non-chord tones highlighted in green and chromatic non-chord/non-scale tones in red.
In our first example, I have marked certain melody notes in two colors:
Green: Notes that do not belong to the underlying chord but can be understood within the prevailing scale.
Red: Notes that belong neither to the underlying chord nor to the prevailing scale.
These distinctions are useful because they help us recognize where the melody temporarily moves away from the established harmony.
The green notes can often be treated as passing or neighboring tones without requiring a new chord.
The red notes deserve particular attention. They introduce chromatic movement that may benefit from a temporary harmonic adjustment.
However, the color alone does not determine the harmonization. The musical context, the direction of the melody, and the intended sound remain important.
2. Returning to Our Chapter 8 Voicing
Example 2 — Ideal Voicing: The harmonized melody of Just Take It Easy, with non-chord tones highlighted in green and chromatic non-chord/non-scale tones in red.
Here we return to the voicing concept developed in Chapter 8.
I have highlighted the notes associated with our non-chord-tone discussion while retaining the established harmonic framework.
This gives us a useful starting point.
Instead of treating every passing note as an entirely new harmonic event, we can examine how the existing voices move and decide where an adjustment would improve the result.
Sometimes the original harmony is sufficient.
At other moments, a temporary passing chord provides a more convincing connection between the surrounding chords.
The important point is that we are not harmonizing individual notes in isolation. We are shaping a musical phrase.
3. Passing Chords: Allowing the Harmony to Move
Example 3 — Ideal Voicing with Passing Chords: Additional chord symbols illustrate the harmonization of chromatic passing notes. The rhythm section continues playing the underlying Gm7 harmony.
In this example, I have added chord symbols above the relevant notes to show my preferred passing harmonies.
An important distinction: These additional chord symbols are included to demonstrate how I harmonized the passing notes within the saxophone section. They do not represent changes to the underlying chord progression.
For example, while the saxophone voices move chromatically upward and downward through the passage, the rhythm section continues playing the original Gm7 harmony.
There is no need for the piano, guitar, or bass to follow every temporary chord suggested by the saxophone voicing.
The basic harmonic structure remains unchanged. The passing harmonies simply allow the individual saxophone voices to move more naturally within that framework.
This distinction is particularly useful for beginning arrangers: A passing chord used to harmonize a melodic line does not necessarily require a corresponding chord change in the rhythm section.
The purpose of these temporary harmonies is to support the melodic movement between the established chords.
A passing chord can create a smoother connection, introduce a moment of harmonic color, or allow the accompanying voices to move more naturally.
This does not mean that every chromatic melody note requires a new chord.
Sometimes maintaining the existing harmony is precisely the right choice.
But when several instruments are playing a harmonized melodic line, I generally pay close attention to the movement of each individual voice.
That brings us to the most important practical part of this chapter.
4. The Preferred Saxophone Section Voicing
Example 4 — Recommended Saxophone Voicing: All five saxophone parts move smoothly through the passing notes, preserving melodic continuity and a natural swing feel.
Here is my preferred harmonization for the saxophone section.
Instead of concentrating exclusively on the vertical chords, look at the horizontal movement of the individual instrumental parts.
The melody moves through its passing and approach notes, while the accompanying voices follow carefully selected paths.
This produces a more connected musical gesture.
The individual saxophone lines are not merely collections of notes belonging to the correct chords. They are melodic lines in their own right.
For me, this is an essential consideration when arranging for a section.
Each player should have a part that feels natural to perform, while the combined voices produce the harmonic effect I want.
Listen to the example while following the score.
Pay particular attention to the movement of the inner voices and the relationship between the melody and its harmonization.
5. When a Correct Voicing Is Not Necessarily the Best Voicing
Example 5 — Less Effective Saxophone Voicing: Keeping the accompanying voices on repeated chord tones creates additional tonguing and interrupts the smooth melodic flow. The effect becomes particularly noticeable at faster swing tempos.
Now let us examine an alternative approach.
In this version, I have retained several accompanying notes within the existing chord instead of allowing those voices to follow the melodic movement.
From a harmonic perspective, this can be a perfectly acceptable solution.
After all, the notes still belong to the underlying harmony.
But there is a practical problem.
Look particularly at the third measure of the saxophone example.
While the melody continues moving, several accompanying instruments repeat the same notes.
These repeated notes require the musicians to articulate successive attacks rather than simply maintaining a connected line.
In a medium swing tempo, this may still work reasonably well.
Nevertheless, it can interrupt the smooth musical flow that I want to achieve.
Depending on the phrasing, the repeated attacks can also prevent the accompanying parts from following the same slurred movement as the melody.
And what happens if we increase the tempo?
The problem becomes more noticeable.
I sometimes compare this effect to driving a car over cobblestones.
Instead of experiencing a smooth, flowing musical phrase, we begin to feel a succession of small interruptions.
The notes may all be harmonically correct, but the musical result is not necessarily convincing.
Compare this version with the first recording while following the two scores.
The point is not that repeated notes are forbidden in Big Band writing. They can be extremely effective when used intentionally.
The problem arises when they are an unintended consequence of keeping the accompanying voices fixed within the chord.
In this particular passage, I prefer the more connected movement of the first version.
6. What Happens at a Faster Tempo?
Finally, listen to the preferred voicing at a faster tempo.
This is an important test for any arranger.
A passage that appears comfortable on paper may behave quite differently when the tempo increases.
The individual instrumental lines, articulation, and overall sectional phrasing become increasingly important.
In our example, the preferred voicing was designed to support the movement of the melody without introducing unnecessary repeated notes into the accompanying parts.
That makes it a more suitable choice for the musical character I want to achieve.
Of course, every arrangement must be judged in its own context.
A short, rhythmically accented passage may benefit from repeated notes. A sustained or smoothly connected phrase may call for a different solution.
The arranger's responsibility is to recognize that distinction.
7. The Arranger's Real Responsibility
There is no single formula that will produce the ideal harmonization for every passing note or chromatic approach.
Different musical contexts require different solutions.
What matters is learning to hear beyond the chord symbols.
When I write for a saxophone, trumpet, or trombone section, I consider not only whether the combined notes form an acceptable harmony, but also how the individual players will perform their parts.
Are the lines comfortable?
Does the articulation support the intended phrase?
Do the voices move naturally?
And, most importantly, does the entire section sound and feel the way I intended?
These are questions that become increasingly important as we develop our arranging skills.
For readers who would like to explore more advanced voicing techniques and harmonic theory, I recommend returning to the reference material provided in Chapter 8.
For now, I would encourage you to experiment with a short melody of your own.
Try harmonizing a passing-note passage in two different ways: first by retaining the existing chord tones, and then by allowing the accompanying voices to move.
Play or listen to both versions.
You may discover that the difference between a correct arrangement and a convincing arrangement is often found in the smallest details.
Good arranging is not simply about finding the right notes. It is about understanding how those notes connect, how musicians will perform them, and how the entire section will sound and feel.
Coming Next — Chapter 10: Writing Big Band Vocal Charts — The Art of Serving the Vocal Artist
A successful Big Band vocal arrangement requires more than effective orchestration and sophisticated harmonies.
The arranger must understand the singer's vocal range, phrasing, interpretation, and individual musical personality.
How do we support a vocalist without overwhelming the melody? When should the ensemble provide subtle backgrounds, and when can the full power of the Big Band become part of the musical expression?
In Chapter 10, the final installment of Inside The Arrangement, we will explore the art of writing for vocalists, including practical considerations of instrumentation, dynamics, phrasing, and the relationship between singer and orchestra.
MusicMyLanguage — Learn. Practice. Perform.
Inside The Arrangement — An Educational Series on Professional Big Band Writing

INSIDE THE ARRANGEMENT — Chapter 8
Discover the art of Big Band voicing in Chapter 8 of Inside The Arrangement. Explore Close Voicing, Drop 2, Drop 2 & 4, chord-root reinforcement, and cluster techniques through practical score and audio examples. Learn how instrumental range, harmonic spacing, and orchestration influence the arranger's musical decisions.
The Art of Voicing
From Harmonic Structure to Musical Expression
Understanding Close Voicing, Drop 2, Drop 2 & 4, and Cluster Techniques in Big Band Arranging
Introduction: Why Voicing Matters
One of the most fascinating aspects of arranging is the ability to transform a relatively simple melody into an entirely different musical experience without changing the melody itself.
A melody can sound intimate, warm, powerful, transparent, sophisticated, or dramatically tense depending on how the accompanying chord tones are distributed among the instruments.
This is the art of voicing.
In Big Band arranging, voicing is far more than the vertical organization of notes. It determines harmonic density, tonal character, balance, and the expressive possibilities of an instrumental section.
An experienced arranger understands not only how to construct different voicings but, more importantly, when and why to use them.
In this chapter, we will examine four voicing techniques using the same melodic material from my composition Just Take It Easy.
All four examples are written for the traditional five-part Big Band saxophone section:
Alto Saxophone 1
Alto Saxophone 2
Tenor Saxophone 1
Tenor Saxophone 2
Baritone Saxophone
By studying the notation and listening to the accompanying recordings, you will discover how different voicing structures can dramatically influence the musical result.
We will then take the analysis one step further by examining what happens when the same harmonic material is transferred to the trumpet and trombone sections.
Before beginning, however, we should establish a few essential theoretical foundations.
1. Before We Begin: Understanding Music Theory
This chapter introduces concepts that require a working knowledge of music theory.
Readers should already understand:
Intervals and their harmonic relationships
Major, minor, diminished, and augmented triads
Seventh chords and extended jazz harmonies
Chord inversions and chord tones
Basic voice leading
The relationship between melody and underlying harmony
Instrument transposition and written versus sounding pitch
These theoretical foundations are essential because arranging requires more than selecting notes that belong to a particular chord.
An arranger must understand the harmonic function of each note and how it relates to the surrounding voices.
For example, the third and seventh of a dominant seventh chord provide essential information about its harmonic quality and function. Extensions such as the ninth or thirteenth introduce additional color.
The distribution of these notes determines whether the resulting voicing sounds compact, open, transparent, or harmonically dense.
If you are unfamiliar with these concepts, I recommend reviewing the music theory resources listed toward the end of this chapter before continuing.
2. Four Voicing Techniques — One Melody
To demonstrate the practical differences between voicing techniques, I have prepared four arrangements of the same melodic passage from Just Take It Easy.
The purpose is not to demonstrate four unrelated harmonic ideas.
Instead, we will explore how a consistent melody and harmonic framework can be transformed through different approaches to voicing.
Our four examples are:
Close Voicing: Baritone Saxophone doubles the melody one octave lower.
Drop 2 Voicing: Tenor Saxophone 2 doubles the melody one octave lower.
Drop 2 & 4 Voicing: Tenor Saxophone 1 doubles the melody one octave lower.
Cluster Voicing: All five saxophones perform independent voices without melody doubling.
Following the Octave-Doubled Melody
To provide all five saxophonists with their own lines, I have doubled the melody one octave lower in the first three examples.
The particularly interesting aspect is that the octave-doubled melody moves between different instruments depending on the selected voicing technique.
In Close Voicing, the Baritone Saxophone performs the lower-octave melody.
In Drop 2 Voicing, this role moves to Tenor Saxophone 2.
In Drop 2 & 4 Voicing, Tenor Saxophone 1 takes over the lower-octave melody.
For the Cluster Voicing example, no melody doubling is used. Instead, all five saxophones perform independent harmonic voices.
To make these relationships easier to identify, the noteheads belonging to the lower-octave melody are marked in red in both the piano reference and the corresponding saxophone staff.
Readers should follow these red notes carefully when comparing the examples.
How to Study the Musical Examples
Each voicing technique is presented through a consistent combination of written notation and audio demonstrations.
A. Combined Piano and Saxophone Score
Each example begins with a single score containing the piano reference on the first staff, followed by the five saxophone parts.
The piano reference presents the voicing in concert pitch, allowing readers to examine the harmonic construction and spacing between voices.
The saxophone staves show how the same harmonic material is distributed among the five instruments in their conventional transposed notation.
This combined presentation makes it possible to compare the harmonic structure directly with its practical instrumental application.
In Examples 1–3, the red noteheads identify the lower-octave melody.
B. Audio — Saxophone Section Only
The first MP3 recording features only the five saxophones.
Without rhythm-section accompaniment, readers can concentrate on the harmonic character of the selected voicing.
Listen carefully to the spacing between voices, the overall density, the melodic clarity, and the section blend.
C. Audio — Saxophone Section with Rhythm Section
The second MP3 recording introduces the rhythm section.
Readers can now hear the same saxophone voicing within a broader musical context.
Notice how the accompaniment influences the perceived harmonic weight, balance, and overall character.
A voicing that sounds particularly exposed when performed by saxophones alone may create a different impression when supported by the rhythm section.
An Important Listening Recommendation
I encourage readers to follow the examples in the order presented.
First, study the combined score.
Next, listen to the saxophone section alone.
Finally, compare it with the recording that includes the rhythm section.
Understanding a voicing on paper is only the beginning. Hearing how it behaves in different musical contexts develops practical arranging judgment.
One additional consideration is the treatment of non-chord tones.
Not every note in a melody necessarily belongs to the underlying harmony. Passing tones, neighboring tones, and chromatic approach notes may create melodic movement while the remaining instruments continue to outline the established chord.
Other situations may call for additional harmonization techniques.
We will explore these possibilities in greater detail in Chapter 9.
A Note on Listening
For the best listening experience, I recommend using good-quality headphones or in-ear monitors with a balanced, natural sound reproduction.
This will help you hear the subtle differences in harmonic spacing, instrumental balance, and tonal character between the four voicing techniques.
Pay particular attention to how each voicing sounds with the saxophone section alone compared with the full rhythm-section accompaniment.
3. Close Voicing — Compact and Direct
Close voicing is one of the fundamental techniques in jazz arranging.
In a conventional four-part close-position voicing, the selected notes are placed as closely together as the harmonic structure permits, generally within the span of an octave.
The melody usually occupies the highest voice, with the remaining voices distributed beneath it.
This creates a compact harmonic structure in which the individual notes are closely connected.
Applying Close Voicing to the Five-Saxophone Section
In our first example, the upper four saxophones establish the close-position harmonic structure.
The Baritone Saxophone doubles the melody one octave lower.
This provides a fifth instrumental line without introducing an additional independent chord tone.
The octave doubling reinforces the melodic contour while giving the section a fuller sound.
The red noteheads identify the lower-octave melody performed by the Baritone Saxophone.
Musical Characteristics
Close voicing can produce a focused, unified section sound.
It is especially useful when an arranger wants to emphasize a melodic phrase through coordinated harmonic movement.
However, close voicing is not equally effective in every register.
In a relatively high register, closely spaced notes may sound brilliant and clearly defined.
When the same structure is moved into a lower register, the result can become excessively dense or muddy.
This is particularly important when writing for lower saxophones or trombones.
An arranger should therefore consider both the harmonic structure and the actual sounding register before deciding to use close voicing.
Musical Example 1 — Close Voicing
Five-Saxophone Section — Baritone Saxophone Doubles the Melody One Octave Lower
A. Combined Score — Piano Reference and Five Saxophones
Example 1 — Close Voicing
Four-part Close Voicing with the melody doubled one octave lower by the Baritone Saxophone. The red noteheads identify the octave-doubled melody.
B. Audio — Saxophones Only
(Close Voicing — Saxophones Only)
C. Audio — Saxophones with Rhythm Section
(Close Voicing — Saxophones and Rhythm Section)
Listening focus: Notice the compact harmonic structure and the additional weight created by the Baritone Saxophone's octave doubling. Compare the isolated saxophone sound with the version supported by the rhythm section.
4. Drop 2 Voicing — Creating Space Within the Harmony
Drop 2 voicing is derived from a close-position chord structure.
The second-highest voice is lowered by one octave, creating a more open distribution of chord tones.
This technique preserves the selected harmonic material while changing its spacing and register.
The resulting sound is often more spacious than close voicing.
Applying Drop 2 to the Five-Saxophone Section
In our second example, the harmonic structure is arranged using the Drop 2 technique.
However, an important change occurs in the distribution of the octave-doubled melody.
Instead of the Baritone Saxophone, Tenor Saxophone 2 now doubles the melody one octave lower.
This demonstrates how the distribution of the harmonic voices influences the assignment of instrumental parts.
The red noteheads identify the lower-octave melody performed by Tenor Saxophone 2.
Compare this carefully with the preceding Close Voicing example.
Musical Characteristics
Drop 2 voicing can provide greater separation between the upper and lower voices.
This may improve clarity in certain registers and create a more open harmonic texture.
However, the effectiveness of Drop 2 depends on the melody's register and the instrumental section performing the passage.
A voicing that works beautifully for saxophones may require adjustment when transferred to trumpets or trombones.
The arranger must also consider the distance between the lowest voices and the resulting balance within the section.
Musical Example 2 — Drop 2 Voicing
Five-Saxophone Section — Tenor Saxophone 2 Doubles the Melody One Octave Lower
A. Combined Score — Piano Reference and Five Saxophones
Example 2 — Drop 2 Voicing
Four-part Drop 2 Voicing with the melody doubled one octave lower by Tenor Saxophone 2. The red noteheads identify the octave-doubled melody.
B. Audio — Saxophones Only
(Drop 2 Voicing — Saxophones Only)
C. Audio — Saxophones with Rhythm Section
(Drop 2 Voicing — Saxophones and Rhythm Section)
Listening focus: Compare this example directly with Close Voicing. How does the wider spacing affect the harmonic character? Notice that the octave-doubled melody has moved from Baritone Saxophone to Tenor Saxophone 2.
5. Drop 2 & 4 Voicing — Expanding the Harmonic Structure
Drop 2 & 4 voicing develops the principle of open harmony further.
Beginning with a conventional four-part close-position structure, the second-highest and fourth-highest voices are lowered by one octave.
This creates a wider distribution of chord tones and a distinctly different harmonic texture.
Applying Drop 2 & 4 to the Five-Saxophone Section
In our third example, the wider spacing requires another change in the distribution of the instrumental voices.
Tenor Saxophone 1 now doubles the melody one octave lower.
The red noteheads identify this octave-doubled melody.
By comparing Examples 1, 2, and 3, readers can observe how the lower-octave melody moves progressively through the saxophone section:
Baritone Saxophone → Tenor Saxophone 2 → Tenor Saxophone 1
This is one of the most instructive aspects of our musical demonstrations.
Although the melody and underlying harmonic framework remain consistent, the distribution of the voices changes considerably.
Musical Characteristics
Drop 2 & 4 voicing can produce a broad, open sound with considerable separation between the upper and lower voices.
Depending on the musical context, this may create a more spacious and orchestral character.
However, wider spacing introduces additional challenges.
The lowest voices may move into registers that are unsuitable for the intended instruments, while the overall distribution may become too widely separated to maintain the desired section blend.
The arranger must carefully examine the actual pitches rather than assuming that an established voicing technique will automatically produce a satisfactory result.
Musical Example 3 — Drop 2 & 4 Voicing
Five-Saxophone Section — Tenor Saxophone 1 Doubles the Melody One Octave Lower
A. Combined Score — Piano Reference and Five Saxophones
Example 3 — Drop 2 & 4 Voicing
Four-part Drop 2 & 4 Voicing with the melody doubled one octave lower by Tenor Saxophone 1. The red noteheads identify the octave-doubled melody.
B. Audio — Saxophones Only
(Drop 2 & 4 Voicing — Saxophones Only)
C. Audio — Saxophones with Rhythm Section
(Drop 2 & 4 Voicing — Saxophones and Rhythm Section)
Listening focus: Observe how the wider distribution changes the harmonic character compared with Close and Drop 2 voicings. Pay particular attention to the octave-doubled melody in Tenor Saxophone 1 and the overall balance of the lower voices.
6. Cluster Voicing — Harmonic Density and Color
Cluster voicing introduces another dimension to harmonic writing.
Rather than relying exclusively on conventional chord-tone spacing, cluster structures place selected notes close together, frequently incorporating seconds or other tightly spaced intervals.
This can create a distinctive harmonic color.
Depending on the selected pitches, instrumentation, and register, clusters may sound delicate, shimmering, intense, or deliberately dissonant.
Applying Cluster Voicing to the Five-Saxophone Section
Our fourth example uses a different approach from the preceding three examples.
There is no octave melody doubling.
Instead, all five saxophones perform their own independent voices.
Each instrument contributes a separate note to the overall harmonic structure without duplicating another voice.
This creates a five-part texture in which the close relationships between individual notes become particularly important.
Extending the Harmony
An important consideration when constructing cluster voicings is that the original chord structure may need to be extended to accommodate the desired harmonic density.
For example, a conventional Fmaj9 chord may be expanded to include additional color tones.
A possible resulting structure would be:
Fmaj6/7/9/#11
This represents an F-major harmony containing the added sixth (or thirteenth), major seventh, ninth, and raised eleventh.
The arranger can select the required notes to create a distinctive cluster texture.
However, writing every available extension into a chord symbol is not always necessary or desirable.
In practical Big Band arranging, particularly when preparing parts for the rhythm section, complicated chord symbols may be simplified to reflect the underlying harmonic function.
The specific extensions and voicings can then be written directly into the instrumental parts.
This avoids unnecessarily complicating the rhythm-section notation while preserving the intended harmonic character of the arrangement.
Musical Characteristics
Cluster voicings can be particularly effective in ballads and contemporary jazz compositions.
Their close intervallic relationships can produce rich harmonic colors and expressive tension.
However, clusters should be used wisely.
A cluster written in the upper register of a saxophone or trumpet section can produce a very different effect from the same structure in the lower trombone register.
Low-register clusters may become difficult to distinguish clearly, particularly when performed with considerable volume or combined with dense rhythm-section accompaniment.
Furthermore, the desired effect depends on the actual intervallic structure and the relationship between the cluster and the underlying harmony.
A cluster should never be used merely because it appears sophisticated on the page.
Its musical function must be clear.
Musical Example 4 — Cluster Voicing
Five-Saxophone Section — Five Independent Voices Without Melody Doubling
A. Combined Score — Piano Reference and Five Saxophones
Example 4 — Cluster Voicing
Five independent saxophone voices creating a harmonically dense cluster texture, without octave doubling or duplicated notes.
B. Audio — Saxophones Only
(Cluster Voicing — Saxophones Only)
C. Audio — Saxophones with Rhythm Section
(Cluster Voicing — Saxophones and Rhythm Section)
Listening focus: Compare the harmonic density, tension, and tonal character with the preceding three examples. Notice how the absence of octave doubling and the inclusion of additional harmonic color tones influence the overall sound.
7. Choosing the Right Voicing — Practical Recommendations
After studying and listening to all four examples, we must address an essential question.
Which voicing technique should an arranger choose?
The answer depends on the musical context.
Close and Drop 2 — Common and Versatile
Close Voicing and Drop 2 Voicing are among the most commonly used techniques in conventional Big Band section writing.
Both approaches offer practical possibilities for harmonizing melodies while maintaining a recognizable and balanced section sound.
Their flexibility makes them particularly useful for arrangers developing their understanding of harmonized section writing.
Drop 2 & 4 — Use with Greater Caution
Drop 2 & 4 creates a more widely spaced harmonic structure.
While this can produce a broad and attractive sound, the technique is generally less suitable for fast-moving melodic passages.
The wider distribution of voices may create technically demanding movements, particularly when individual instruments must negotiate large intervals or rapid changes of register.
Furthermore, Drop 2 & 4 should not be used indiscriminately in low registers.
The resulting lower voices may become acoustically unclear or technically impractical.
For these reasons, an arranger should evaluate the melody's register, tempo, and instrumental requirements before choosing this approach.
Cluster Voicing — A Distinctive Harmonic Color
Cluster Voicing offers a different harmonic character.
Its dense intervallic structure can be particularly effective in ballads and contemporary music.
However, the technique should be used selectively.
Clusters can introduce expressive tension and rich harmonic colors, but excessive use may reduce contrast and make the overall arrangement unnecessarily dense.
The most effective voicing is not necessarily the most complicated one. It is the one that best serves the music.
8. Can the Same Voicing Work for Trumpets or Trombones?
After listening to the four saxophone examples, we can take our analysis one step further.
Suppose we want to use the same melody from Just Take It Easy with the trumpet or trombone section.
Would the same voicing work equally well?
This question connects directly with Chapter 7, where we explored instrumental notation, transposition, and practical playing ranges.
To demonstrate the practical consequences, I have prepared two additional score excerpts based on the Close Voicing from Example 1.
First: Adjusting the Number of Voices
Our saxophone example uses five instruments.
A conventional Big Band trumpet section consists of four trumpets, while the trombone section generally consists of three tenor trombones and one bass trombone.
Therefore, when adapting the example to these four-part sections, we omit the lower-octave melody doubling.
The fundamental four-part harmonic structure remains intact.
Although the octave reinforcement disappears, the essential harmonic character of the voicing can be preserved.
Example A — Close Voicing for Four Trumpets
Example 5 — Close Voicing for Four Trumpets
The Close Voicing from Example 1, adapted for four trumpets without octave doubling. This example illustrates the importance of evaluating instrumental registers before transferring a voicing between sections.
When we transfer the same sounding pitches to the trumpet section, an immediate problem becomes apparent.
The voicing occupies a register that is too low to achieve the desired characteristic trumpet-section sound.
Although some of the individual notes may be technically playable, the overall texture does not provide the brilliance, clarity, or projection normally associated with effective trumpet-section writing.
This demonstrates an important distinction between a technically possible arrangement and a musically effective one.
Example B — Close Voicing for Four Trombones
Example 6 — Close Voicing for Four Trombones
The same four-part Close Voicing adapted for the trombone section, illustrating the upper-register demands and technical considerations for professional versus student ensembles.
For the trombone section, the situation is quite different.
The same harmonic material reaches into the upper practical register of the instruments.
Professional trombonists with sufficient range, flexibility, and endurance may be able to perform the passage effectively.
However, for student or intermediate ensembles, the demands could be excessive.
The arranger must therefore consider not only whether the notes are technically playable but also whether the passage can be performed comfortably, accurately, and with the desired musical expression.
The Arranger's Responsibility
These two examples illustrate an essential principle:
A harmonically correct voicing is not automatically an effective instrumental voicing.
Before constructing or transferring a voicing, an arranger must consider:
The actual sounding register of the melody
The practical playing ranges of the intended instruments
The technical flexibility required by the passage
The desired section sound
The abilities of the musicians performing the arrangement
Only after considering these factors should the arranger determine the most appropriate voicing structure.
Do not select a voicing first and then force the instruments to accommodate it. Understand the instruments and their musical possibilities before constructing the voicing.
This principle is fundamental to effective orchestration.
9. The Most Important Question: Which Voicing Should You Choose?
After studying these techniques, beginning arrangers may naturally ask:
Which one is best?
The answer is simple: there is no universally superior voicing technique.
The appropriate choice depends on the musical situation.
A technically correct voicing can still be a poor arranging decision.
This distinction separates theoretical knowledge from practical orchestration.
Consider the Musical Character
What should the passage communicate?
A lyrical saxophone melody may benefit from a warm, unified texture.
A powerful ensemble passage may require greater harmonic weight and broader orchestration.
A dramatic transition might benefit from the tension of a cluster.
The intended musical expression should guide the voicing decision.
Consider the Instrumental Register
Every instrument has its own acoustic characteristics.
The same harmonic structure can sound completely different when assigned to saxophones, trumpets, or trombones.
A voicing may be technically playable yet acoustically ineffective.
For example, a closely spaced chord in the lower trombone register may sound heavy and indistinct.
Moving the voicing higher, changing its spacing, or selecting a different distribution of chord tones may improve clarity.
Likewise, a high trumpet voicing may produce considerable brilliance but become physically demanding during an extended passage.
The arranger must understand the difference between an instrument's theoretical range, practical playing range, and most effective musical register.
Consider the Musicians' Abilities
Writing for professional musicians is not the same as writing for an educational ensemble.
Advanced performers may comfortably handle demanding registers, complex rhythms, difficult intervals, and challenging articulation patterns.
Beginning or intermediate musicians require a different approach.
An effective arranger adapts the music to the ensemble without unnecessarily compromising the musical idea.
Consider Section Writing Versus Tutti Writing
A voicing that sounds excellent when performed by an isolated saxophone section may behave differently within a full Big Band tutti.
When saxophones, trumpets, trombones, and rhythm section perform simultaneously, the overall harmonic texture becomes considerably more complex.
The arranger must consider:
Which section carries the primary melody?
Which voices reinforce the harmony?
Are instruments competing within the same register?
Does the orchestration provide sufficient contrast?
Are lower voices reinforcing the harmonic foundation or creating unnecessary density?
Is the intended voicing appropriate for an individual section, or does it become effective only within the complete ensemble texture?
Some voicing choices may be especially useful in a powerful tutti passage but less convincing when assigned to a single section.
Others may be beautiful in exposed writing yet lose their individual character when surrounded by additional instruments.
Understanding these relationships is essential for effective Big Band orchestration.
10. From Theory to Practical Arranging
The purpose of learning voicing techniques is not to memorize a collection of formulas.
It is to develop the ability to make informed musical decisions.
When working on a new arrangement, I recommend the following process.
First, establish the melody and harmonic framework.
Understand the chord progression and identify the notes that define its harmonic character.
Second, determine the desired musical expression.
Should the passage sound compact, broad, transparent, powerful, or tense?
Third, examine the instrumental ranges and technical requirements.
Before distributing the harmony, evaluate whether the intended instruments can perform the passage comfortably and effectively.
Fourth, choose an appropriate voicing structure.
Experiment with Close, Drop 2, Drop 2 & 4, Cluster, or other harmonic distributions.
Fifth, listen critically.
Do not rely exclusively on the appearance of the score.
Playback can be useful during preparation, but the final judgment should also consider the sound and response of real musicians.
Finally, evaluate the passage within the complete arrangement.
A voicing should support the musical structure, not merely sound impressive in isolation.
11. A Practical Listening Exercise
After listening to all four examples from Just Take It Easy, return to the beginning and compare them once more.
This time, ask yourself:
Which voicing produces the most compact harmonic sound?
Which example creates the greatest sense of openness?
How does the octave-doubled melody change as it moves from Baritone Saxophone to Tenor Saxophone 2 and Tenor Saxophone 1?
Which example introduces the greatest harmonic tension?
How does the Cluster Voicing sound without any duplicated notes?
Which voicing would you choose for an exposed saxophone melody?
Would you make a different choice for a powerful Big Band tutti?
Would the same voicing work equally well for trumpets or trombones?
How would your decision change if you were arranging for intermediate rather than professional musicians?
There may be more than one convincing answer.
That is precisely the point.
Arranging is not simply the application of theoretical rules. It is the art of making musical choices.
12. Further Voicing Techniques — Beyond This Chapter
The four techniques demonstrated in this chapter provide a foundation for understanding harmonized Big Band section writing.
However, the possibilities extend considerably further.
In the upcoming expanded book version of Inside The Arrangement, I plan to explore additional approaches, including:
Voicing techniques involving instrumental doublings, such as flutes
Combining Flutes, Clarinets, and Bass Clarinet
Embedding the melody within a harmonic structure rather than placing it exclusively in the highest voice
Positioning the melody in the lowest voice of an instrumental section
Advanced voicing techniques for full Big Band tutti passages
These approaches offer additional possibilities for creating distinctive orchestral textures and expanding the expressive range of an arrangement.
However, introducing too many techniques at once can make the learning process unnecessarily complicated.
For the present chapter, I recommend concentrating on the four demonstrated voicing methods and developing a clear understanding of their practical applications.
Readers wishing to explore advanced arranging techniques are encouraged to consult the recommended literature below.
13. Recommended Study Resources
A. Music Theory Foundations
A Complete Guide to Music Theory — Arabesque Conservatory
https://www.arabesqueconservatory.com/blog/a-complete-guide-to-music-theory/
An introduction to fundamental music theory concepts, including intervals, scales, chords, and notation.
These principles form the foundation for both classical and jazz arranging.
Jazz Theory — PDF Study Resource
https://www.saxonline.it/wordpress/wp-content/uploads/2011/10/JazzTheory.pdf
An additional resource for readers who wish to strengthen their understanding of jazz harmony and related theoretical concepts.
B. Advanced Arranging and Orchestration
Rayburn Wright — Inside the Score
https://sheetmusiclibrary.website/rayburn-wright-scores/
An analytical study of eight jazz ensemble arrangements by Sammy Nestico, Thad Jones, and Bob Brookmeyer.
The book explores voicings, melodic construction, orchestration, textures, and other essential arranging techniques.
It offers an opportunity to study how established arrangers apply harmonic and orchestral principles in actual Big Band scores.
Don Sebesky — The Contemporary Arranger, Definitive Edition
https://www.goodreads.com/book/show/2727538-the-contemporary-arranger-definitive-edition
A comprehensive reference for arrangers seeking to expand their understanding of orchestration, instrumental writing, and contemporary arranging techniques.
Bill Dobbins — Jazz Arranging and Composing: A Linear Approach
https://www.amazon.com/dp/3892210063
An advanced arranging reference emphasizing linear writing, voice leading, melodic development, and the interaction between individual instrumental lines.
This approach provides an important perspective beyond the purely vertical construction of chord voicings.
These books are recommended for readers who wish to move beyond introductory theory toward a deeper understanding of professional arranging.
14. Final Thoughts: The Art Behind the Technique
Voicing is one of the most powerful expressive tools available to an arranger.
The same melody can acquire entirely different characteristics through relatively small changes in harmonic spacing, chord-tone distribution, and instrumental register.
Close voicing can create unity and concentration.
Drop voicings can introduce openness and a broader harmonic texture.
Cluster voicings can create distinctive colors and tension.
Octave doubling can reinforce the melody, while alternative melody placement offers additional possibilities for shaping the overall section sound.
Yet none of these techniques guarantees a successful arrangement.
The true challenge is knowing when to use them, how to adapt them to the available instruments, and how to integrate them into the larger musical structure.
This requires theoretical knowledge, practical experience, critical listening, and an understanding of the musicians performing the music.
The art of voicing is not simply knowing how to distribute notes. It is knowing which notes belong in which register, on which instruments, and at which musical moment.
That is where arranging becomes an art.
Coming Next — Chapter 9: Harmonizing Non-Chord Tones
Passing Notes, Approach Notes, and the Art of Melodic Harmonization
Not every note in a melody belongs to the underlying chord.
Passing notes, neighboring tones, and chromatic approaches create movement, expression, and melodic interest.
But how should an arranger harmonize these notes when writing for a saxophone, trumpet, or trombone section?
Should the underlying harmony remain unchanged, or should the accompanying voices move with the melody?
In Chapter 9, we will explore practical techniques for harmonizing non-chord tones, supported by musical examples and audio demonstrations.
Coming in Chapter 10: Writing Big Band Vocal Charts — The Art of Serving the Vocal Artist.
MusicMyLanguage — Learn. Practice. Perform.
Inside The Arrangement — An Educational Series on Professional Big Band Writing

INSIDE THE ARRANGEMENT— Chapter 3
How should piano and guitar work together in a Big Band arrangement without stepping on each other’s toes? In Chapter 3 of Inside The Arrangement, we explore their different roles, using Just Take It Easy as a practical example—from four-to-the-bar guitar comping to sparse piano fills, kicks and voicings that support the ensemble.
What Do the Piano & Guitar Players Do?
How do piano and guitar serve a band chart and help create a satisfying, functional rhythm section—without stepping on each other’s toes?
The answer depends first on one very important factor:
The musical style of the arrangement.
For this chapter, let’s continue with Just Take It Easy and look at how I approached the piano and guitar parts step by step.
As I mentioned in Chapter 1, the inspiration for this composition came from Frank Foster’s Shiny Stockings, so wonderfully associated with the Count Basie Orchestra.
In that style, the roles of piano and guitar are beautifully clear.
The guitarist provides steady quarter-note chords, helping maintain the “In 4” flow together with the walking bass and drums.
The pianist does something very different.
Instead of constantly filling the harmony, the piano contributes occasional fills, accents and carefully placed chord kicks around the melody.
The result is not two chordal instruments competing for the same musical space.
It is two instruments performing different jobs inside the same rhythm section.
Audio Example 3.1 — Full Big Band: Piano & Guitar in Context
Listen to how piano and guitar perform different roles within the complete arrangement of Just Take It Easy. The guitar maintains the quarter-note swing flow, while the piano adds selective fills and chord kicks around the melody and ensemble figures.
Note: This audio example also accompanies the notation examples below.
⸻
A) THE PIANO
When writing the piano part, I normally think first about how much freedom the pianist should have.
There are three practical approaches.
Option 1 — Guide the Professional Player
For an experienced professional pianist—especially when performing a new or unfamiliar composition—I strongly recommend a two-stave piano part.
The upper stave can contain:
a melody guide
important woodwind or brass figures
fills and kicks that the pianist needs to know about
Example 3.1 —Melody Guide including Ensemble Cues & Piano Lead Sheet
Example 3.1 — Piano Melody Guide and Ensemble Cues
The lower stave can then function more like a chord sheet.
This gives the pianist enough information to understand what is happening in the arrangement while still leaving room to create appropriate fills and chord kicks
For me, this is an important principle.
I don’t want to dictate every note if the player already knows how to create an effective jazz piano part.
I want to provide the information the player needs.
Then I leave room for musicianship.
Important: Anticipated notes should use the chord of the following beat. See, for example,
the anticipated note on beat 4+ in bar 7, leading into bar 8.
⸻
Option 2 — Write It Out
For student or developing ensembles, I would normally take a different approach.
The upper stave still provides the melodic and ensemble information.
But on the lower stave, I can write out the fills, voicings and rhythmic chord figures.
Example 3.2 — Melody Guide & Fully Written Piano Part
Example 3.2 — Melody Guide & Fully Written Piano Part
This removes unnecessary uncertainty and helps the pianist handle the chord progression correctly.
In this situation, the piano part serves two purposes:
It tells the player what to play, while also showing how a functional piano part can be constructed.
I still include the chord symbols above the Melody Guide, even when the piano part is fully written out.
There are two reasons for this:
First, for educational purposes, I want the pianist to understand which chords are actually being played rather than simply reading the written notes.
Second, if a young player is already familiar with most of the chord symbols, they can gradually begin to connect the written voicings with the underlying harmony.
This helps develop harmonic awareness and, eventually, gives the pianist more freedom to interpret the part rather than relying exclusively on the written notation.
⸻
Option 3 — Combine Freedom and Direction
The third possibility is often particularly useful with professional players.
Some passages can be left with chord symbols and freedom.
Other fills or chord figures may be important enough that I want them played exactly as written.
So the piano part becomes a combination of:
written material + chord symbols + ensemble information
Example 3.3 — Melody Guide & Combined Written and Open Piano Part
Example 3.3 — Melody Guide & Combined Written and Open Piano Part
This gives me control where the arrangement requires it, without unnecessarily restricting the pianist everywhere else.
⸻
B) THE GUITAR
The guitar has a different function in Just Take It Easy.
In this Basie-influenced swing style, the guitarist’s main job is to support the quarter-note flow.
Again, there are several ways to notate this.
Option 1 — The Chord Sheet
For an experienced guitarist, a single-stave chord part is normally sufficient.
But I don’t like giving the guitarist only chord symbols with no information about the arrangement.
The part should also indicate what is happening around the player:
saxes carrying the melody
trombones in the background
brass figures
shout chorus
significant breaks
important rhythmic hits
Example 3.4 — Guitar Chord Part with Arrangement Cues
Example 3.4 — Guitar Chord Part with Arrangement Cues
This allows the guitarist to understand not only what chord to play, but also what role the guitar is playing at that moment.
That is much more useful.
⸻
Option 2 — Guitar Doubles the Melody
Sometimes I want the guitar to become part of the orchestration itself.
For example, the guitar may double the melody to create a particular color.
Example 3.5 — Guitar Doubling the Melody
Example 3.5 — Guitar Doubling the Melody
IMPORTANT : The Guitar Sounds One Octave lower than written
Audio Example 3.2.1— Guitar Melody Doubling (With Saxes Only)
Listen to the example without the rest of the band - just Guitar doubling the Sax Section
Audio Example 3.2.2— Guitar Melody Doubling (With Full Orchestra)
Now you can probably hear the Guitar, playing the melody even with the full Big Band
In a published arrangement, I would consider providing both possibilities where appropriate.
Not every guitarist is equally comfortable with sight-reading fully notated melodic material, while others may welcome it.
Giving the player a practical alternative can make the arrangement considerably more usable.
⸻
Option 3 — Combine Melody and Chords
Example 3.6 — Melody Guide including Ensemble Cues & Guitar Lead Sheet
Example 3.6 — Melody Guide including Ensemble Cues & Guitar Lead Sheet
At first glance, this two-stave format looks very similar to Option 1 for the piano: the melody and important ensemble cues provide the guitarist with a clear picture of what is happening in the arrangement.
There is, however, one important difference.
Unlike the piano version, the guitar part does not contain written-out piano-specific chord voicings, fills, or rhythmic figures. Instead, the second stave is reserved exclusively for information relevant to the guitarist.
This keeps the part clean and practical while still allowing the guitarist to see the musical context of the arrangement and understand exactly how the guitar fits into the ensemble.
Again, the decision is based on what the music requires.
Not on the idea that one notation method is automatically better than another.
⸻
What If There Is No Guitarist?
This is a very practical question.
Many ensembles simply don’t have a guitarist.
In that case, the pianist normally needs to take a slightly more active harmonic role.
But that does not necessarily mean playing constantly.
In Just Take It Easy, the walking bass and drums already provide a strong “In 4” foundation.
The pianist can therefore add enough chordal support to maintain the harmonic texture without trying to imitate the guitar part note for note.
All three piano-part approaches discussed above can still work.
The important thing is to understand what has disappeared from the texture—and then decide whether the piano actually needs to replace it.
⸻
Do Piano and Guitar Always Need to Play Together?
No.
And this may be one of the most important lessons in this chapter.
Just because both instruments have chord symbols does not mean both instruments need to play at the same time.
Sometimes the guitar should carry the pulse while the piano leaves space.
Sometimes the piano should provide a fill while the guitar keeps its part simple.
Sometimes one instrument should stop completely.
Space is part of the arrangement.
If both instruments constantly play full chords, rhythmic figures and fills, even perfectly correct notes can create a rhythm section that sounds cluttered.
So the question is not:
Can both instruments play here?
The better question is:
Does the music need both instruments here?
⸻
A Word About Piano Voicing
Chord voicing is a large subject in itself.
Shell voicings, guide tones, rootless voicings, extensions, alterations, drop voicings and many other approaches can dramatically change the sound of a jazz piano part.
That topic would take us far beyond the purpose of this chapter.
There are excellent dedicated resources available for pianists who want to explore voicings in greater depth. For example,
Piano With Jonny presents a structured overview including shell voicings, guide tones, rootless voicings, block chords, drop-2 voicings and quartal voicings.
Additional useful resources include the Jazz Tutorial guides and J.B. Dyas’s Jazz Piano Voicings
For Inside The Arrangement, however, our focus is different.
We are asking:
How does the piano function inside the arrangement?
And that is an arranger’s question.
⸻
The Bigger Picture
Piano and guitar are both harmonic instruments.
But that does not mean they should perform identical jobs.
In Just Take It Easy, the guitar helps establish the quarter-note swing flow.
The piano adds color, punctuation and occasional fills.
The bass connects harmony and pulse.
The drums complete the rhythmic framework.
Each instrument contributes something different.
That is why the rhythm section works.
Good rhythm-section writing is not about giving every player something interesting to do every second.
It is about giving each player the right job at the right moment.
And sometimes the most effective thing a musician can play is:
nothing.
⸻
Coming Next
Chapter 4 — The Drums: Why Is Detailed Drum Notation So Important?
The bass establishes direction.
Piano and guitar shape the harmonic and rhythmic framework.
But there is one instrument that can change the entire character of the arrangement almost instantly:
The drums.
How much should an arranger actually write?
Which ensemble figures should appear in the drum part?
When should the drummer follow the written material—and when should the arranger leave room for interpretation?
And why can a carefully prepared drum part make rehearsals dramatically more efficient?
In Chapter 4, we’ll look at drum notation step by step.
See you in the next chapter.

INSIDE THE ARRANGEMENT — Chapter 2
What makes a great bass line? Explore the essential choices between “In 2” and “In 4,” discover basic walking bass patterns, and learn how the bass works with the rhythm section to bring an arrangement to life. Includes practical sheet music and audio examples.
The Bass Line: Choose the Right Bass Line and You’re Golden
You can write a great melody. You can find beautiful chords. You can even have a killer drum groove.
But choose the wrong bass line — and somehow the whole arrangement just doesn’t sit right.
The bass is one of the most important links between harmony and rhythm.
It supports the chord progression, locks in with the drums, gives the music direction and, perhaps most importantly, helps determine how the entire arrangement feels.
And there isn’t just one way to do it.
As a composer or arranger, you have several basic approaches to choose from.
In this chapter of Inside The Arrangement, I’ll introduce some of the most useful ones, accompanied by audio examples and sheet music,
so you can both see and hear the difference.
But before we get to the notes, there is one important principle:
A great bass line doesn’t work alone.
The bass player needs solid support from the other rhythm-section players. Drums, piano and guitar all contribute to the groove and harmony.
When they work together, the bass line doesn’t merely support the melody - it helps carry the entire arrangement.
So, let’s get started.
⸻
1. Playing “In 2”
When musicians say that the bass is playing “in 2,” it basically means that the bass emphasizes two notes within a 4/4 measure,
usually giving the music a spacious two-beat feeling.
It is simple - but simple does not mean boring.
There are several ways to create an effective in 2 bass line.
Root notes only
The simplest version is to play the root of the chord on beats 1 and 3.
This clearly establishes the harmony and gives the rest of the rhythm section plenty of space.
For better audible results please use headphones / proper in ears
Root notes — changing octaves
Now take the same basic idea but alternate between different octaves of the root.
The harmonic information hasn’t changed, but the line immediately has more movement.
Root and fifth
Another classic approach is to alternate between the root and fifth of the chord.
It is still harmonically simple, but the fifth adds another dimension and creates a stronger sense of motion.
Root & Fifth
Root and fifth — with a little rhythmic movement
We can make the same idea more interesting by introducing a small rhythmic phrase around beats 1 and 2.
Now the bass is beginning to do more than simply state the harmony. It starts contributing its own rhythmic character to the arrangement.
Mixing “In 2” and quarter-note movement
Here is another useful variation.
Instead of maintaining exactly the same pattern in every measure, try a two-bar phrase:
Bar 1: two half notes
Bar 2: four quarter notes
The bass is still creating an overall in 2 character, but the second measure introduces forward motion.
This is a very simple arranging device — and a very effective one.
⸻
2. Playing “In 4” — The Walking Bass Line
Now things start moving.
When the bass plays four quarter notes in a 4/4 measure, we call this playing “in 4.”
In jazz, this is commonly associated with the walking bass line.
And this is where understanding harmony becomes particularly important.
A good walking bass line shouldn’t simply play the root four times:
1 – 1 – 1 – 1
That would establish the chord — but after a while it would become rather boring.
Instead, the bass player uses chord tones, scale tones and passing notes to create a melodic line that connects one chord to the next.
This is also why the bass player needs a rhythm section that clearly supports the correct chords and chord progression.
The better the harmonic foundation, the more naturally the bass can create movement through the harmony.
Here are a few basic patterns to get started.
1 – 1 – 5 – 5
Root – Root – Fifth – Fifth
A very straightforward pattern and a good starting point for understanding the sound of four quarter notes against the harmony.
1 – 2 – 3 – 5
Root – Second – Third – Fifth
Now we are beginning to hear the line as something melodic rather than simply a sequence of chord root & fifth.
1 – 2 – 3 – 1
Root – Second – Third – Root
Another simple way of moving through the scale while keeping the root as a strong reference point.
1 – 7 – 6 – 5
Root – Seventh – Sixth – Fifth
Here the line moves downward, creating a completely different sense of direction.
These aren’t rules.
Think of them as building blocks (or pattern).
Once you understand what they do, you can combine them, change their direction and adapt them to the chord progression.
⸻
What If the Chord Lasts Longer?
This is where things become even more interesting.
Suppose one chord lasts for two complete measures.
Playing exactly the same four-note pattern twice isn’t your only option.
You can create a longer melodic journey through the harmony.
For example:
1 – 7 – 6 – ♭6 | 5 – 4 – 3 – 2
Suddenly eight quarter notes form one continuous line.
And notice something important: the bass isn’t simply describing the chord anymore.
It is creating direction.
That is one of the secrets of a good walking bass line.
Every note should make you want to hear where the next one is going.
⸻
Should You Write the Bass Line Out?
This depends entirely on who is going to play your arrangement.
An experienced professional jazz bassist usually doesn’t need every quarter note written out.
Give an experienced player a lead sheet or bass part containing the chord progression and tell them:
“In 2.”
or
“Walk in 4.” (or just “In 4”)
…and they will know what to do.
In fact, allowing a good bass player some freedom can often produce a more natural result than trying to notate every single note yourself.
But there is an important exception.
Writing for Student Bands
If you’re arranging for a school ensemble, developing jazz band or educational publisher, I recommend a different approach.
Write out a suitable bass line and include the chord symbols above it.
I would also mark the intended feel — for example:
In 2
or
Walking in 4
Why both?
Because you’re doing two things at the same time.
You’re giving a developing bass player something they can perform successfully right now,
while also showing them how a bass line relates to the underlying chord progression.
Eventually, they may stop needing the written notes.
And that’s exactly what you want.
⸻
The Bigger Picture
The bass line is only one part of the rhythm-section puzzle.
A great bass player needs to know where the harmony is going.
The drummer needs to support the feel.
And piano and guitar have to provide the right harmonic and rhythmic framework without getting in the bass player’s way.
When all of those elements fit together, something wonderful happens:
The rhythm section stops sounding like four musicians playing individual parts.
It starts sounding like one instrument.
And that brings us perfectly to the next chapter of Inside The Arrangement:
Chapter 3: What Do the Piano & Guitar Players Do?
We’ll look at chord voicings, rhythmic comping, how piano and guitar can support the bass and drums -
and, just as importantly, how to keep them from stepping on each other’s toes.
See you in the next chapter.
Rolf Becker
Composer · Arranger · Conductor
MusicMyLanguage — Learn. Practice. Perform.

INSIDE THE ARRANGEMENT — Chapter 1
What comes first when composing a new tune — melody, chords or groove? Follow “Just Take It Easy” from its first musical idea to a complete big-band arrangement in this new step-by-step series, with audio examples along the way.
From First Idea to Full Big Band
Chapter 1 — What Comes First: Melody, Chords or Groove?
How does a new composition actually begin?
With a melody?
A chord progression?
A bass line?
Or simply a groove that makes you want to play?
The answer is:
Any of them can come first.
There is no single formula for composing an instrumental tune.
Sometimes a melody suddenly appears in your head.
Sometimes you discover a chord progression that creates exactly the atmosphere you’re looking for.
And sometimes everything starts with a rhythm or groove.
For this new Inside the Arrangement series, however,
I don’t want to talk about composition and arranging only in theory.
I’m going to show you.
We’ll take one of my original compositions and follow it step by step
from its basic musical idea through harmony,
rhythm-section writing and orchestration,
until eventually it becomes a full big-band arrangement.
The tune is called:
“Just Take It Easy”
It’s a medium-swing composition inspired by the classic Count Basie big-band tradition.
Tempo: Medium Swing — ♩ = 110
The complete composition has an AABA form,
but we’ll begin with only the first 16 bars.
Why?
Because before we start adding instruments, voicings, backgrounds and orchestration,
I want you to hear what happens to the music when we change just one element at a time.
⸻
The First Ingredient: Melody
Let’s begin with the most exposed version possible.
Just the melody.
No chordal accompaniment.
No walking bass.
No drums.
No big band.
When a melody is heard on its own, there’s nowhere for it to hide.
Listen to its rhythmic character. Notice the short phrases and the spaces between them.
Listen to the repetition and development of the musical idea.
And ask yourself:
What harmony would you hear underneath this melody?
Don’t look for the “correct” answer yet.
Just listen.
🎧 AUDIO EXAMPLE 1
“Just Take It Easy” — Melody Only
⸻
Now Let’s Add Harmony
The melody gives us our horizontal musical line.
Harmony adds the vertical dimension.
For Just Take It Easy, I chose a harmonic progression that supports the relaxed swing character
while still providing enough movement and color to make the melody interesting.
But instead of immediately adding the entire rhythm section,
let’s hear what happens when we add only the harmonic framework.
For this example, the chords are supported by Freddie Green-style guitar accompaniment
- the classic four-to-the-bar approach associated with the Count Basie rhythm section.
Listen again to exactly the same melody.
This time, notice how differently individual melody notes can feel once you hear the harmony underneath them.
A note that sounded neutral on its own may suddenly create tension.
Another may sound completely settled.
And the movement from one chord to the next starts giving the melody direction.
🎧 AUDIO EXAMPLE 2
“Just Take It Easy” — Melody + Chords
⸻
Melody and Chords Aren’t Two Separate Things
This is an important point.
When composing, I don’t think of melody and harmony as two completely independent layers.
They communicate with each other.
A melody note can suggest a particular chord.
But the opposite is also true:
A chord can change the way we hear a melody note.
And there is another element that can dramatically change both of them.
The bass.
Changing the bass note underneath a chord can alter its color, direction and function
- even when the notes above it remain unchanged.
We’ll explore that much more closely in the next chapter.
For now, however, something is still missing.
We have melody.
We have harmony.
But we don’t yet have the complete feel of the tune.
⸻
Enter the Rhythm Section
Now let’s add the rhythm section.
This is where Just Take It Easy really begins to reveal its personality as a swing tune.
The harmonic pulse is joined by a walking bass line and drums establishing the swing feel.
Listen to the same 16 bars again.
Nothing fundamental has happened to the melody.
But the musical experience has changed considerably.
Suddenly there is forward motion.
There is pulse.
There is interaction.
There is groove.
🎧 AUDIO EXAMPLE 3
“Just Take It Easy” — Melody + Rhythm Section
⸻
Listen Again — But Differently
Now go back and compare the three examples.
Melody
→ Melody + Chords
→ Melody + Rhythm Section
The melody hasn’t changed.
So what has?
Almost everything around it.
This is one of the most important lessons in arranging.
An arrangement isn’t simply about adding more instruments.
It’s about deciding what each additional musical element contributes.
Sometimes adding something makes the music stronger.
Sometimes removing something does.
And sometimes one carefully chosen bass note can have more impact than adding an entire section of instruments.
⸻
What Comes First?
So let’s return to our original question.
Melody, chords or groove?
There is no universal answer.
You can start with a melodic fragment.
You can sit at the piano and discover a chord progression.
You can create a bass line.
You can hear a drum groove.
You might even begin with nothing more than a rhythmic figure.
The important thing is to recognize when you have found an idea worth developing.
Then ask:
What does this idea need next?
Not:
What can I add?
But:
What does the music need?
That small difference in thinking becomes increasingly important as an arrangement grows.
Because eventually we’ll have many more possibilities at our disposal:
Saxophones.
Trumpets.
Trombones.
Piano.
Guitar.
Bass.
Drums.
Different registers.
Different voicings.
Different combinations.
Different colors.
But before we get anywhere near the full big band, we need to make sure that the foundation is right.
And that takes us to the bottom of the arrangement.
⸻
Coming Next: The Bass Line
Choose the Right Bass Line and You’re Golden
In the next chapter of Inside the Arrangement,
we’re going to take these same 16 bars of Just Take It Easy and look underneath the melody and chords.
We’ll examine the walking bass line.
Why this note?
Why not simply play the root of every chord?
How can the bass connect one chord to the next?
Where can we use chord tones, passing notes and chromatic approaches?
And how much of a bass line should an arranger actually write?
We’ll see it in the score and hear it in the music.
Because a good bass line doesn’t merely tell us what chord we’re playing.
It helps tell us where the music is going.
And when you choose the right bass line…
you’re golden.
To be continued in Chapter 2 of Inside the Arrangement — From First Idea to Full Big Band.

Did You Know…
Music Is My Language
Did you know that there are approximately 7,170 living languages spoken around the world?
But there’s only 1 language that connects the world:
MUSIC
that there are approximately 7,170 living languages spoken around the world?
According to Ethnologue, the world's leading linguistic database, Asia alone is home to more than 2,300 languages, Africa to over 2,100, Oceania to around 1,300, the Americas to nearly 1,000, and Europe to about 280.
To reach readers across cultures and borders, great literary works must be translated. For example, The Lord of the Ringshas been translated into more than 80 languages. Yet even when we speak the same language, misunderstandings can still occur:
"I guess I misunderstood you there."
Music is different.
Whether Mozart's Eine kleine Nachtmusik is performed in Beijing, Berlin, New York, Cairo, or Sydney, it speaks with the same voice. It requires no translation. Its meaning transcends borders, cultures, and languages.
Music is perhaps humanity's most universal language.
But like any language, it must be learned, practiced, and mastered.
Your instrument is more than wood, brass, strings, or keys—it is your voice transmitter. Through it, you express thoughts, emotions, stories, and ideas that words often cannot capture.
The purpose of this website is to help you develop a practice routine tailored to your personal goals, enabling you to become confident, expressive, and fulfilled as a musician. Whether you are a beginner, an advancing student, or an experienced performer, you will find resources designed to help you make your instrument truly speak.
Explore
Professional backing tracks
Learn / Request
Specialized workshops & clinics covering a variety of musical topics
Guest conducting
Band charts, tailored for your ensemble
Perform
Unique Play-Alongs, only available at Music-My-Language
Ensemble arrangements
Band and Big Band charts
Everything you need to move beyond practice and into performance.
Because when your instrument becomes your voice, and your voice is understood everywhere, you can proudly say:
Music Is My Language